Palworld: Dungeons - Where to Find and How to Beat

Author
GameVillage Team
Last updated on

Learn where to find and how to beat Dungeons in Palworld. Explore these dungeons that respawn over time to encounter bosses and loot precious items.

Dungeon Locations and Respawn Time

All Dungeon Locations

Dungeon List

Dungeon Recommended Level
Hillside Cavern Lv13
Isolated Island Cavern Lv13
Ravine Grotto Lv19
Mountain Stream Grotto Lv29
Cavern of the Dunes Lv38
Volcanic Cavern Lv40
Sacred Mountain Cavern Lv45

Dungeon Routes

Navigate Hillside Cavern - Mountain Stream Grotto Routes

Pattern 1 Pattern 2 Pattern 3

Navigate Cavern of the Dunes Route

Pattern 1 Pattern 2 Pattern 3

Navigate Volcanic Cavern Route

Pattern 1 Pattern 2 Pattern 3

Navigate Sacred Mountain Cavern Route

Pattern 1 Pattern 2 Pattern 3

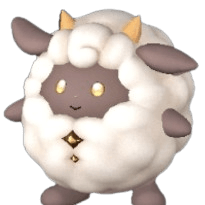
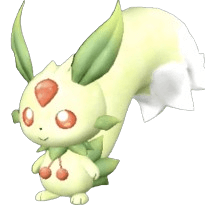
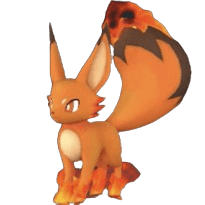
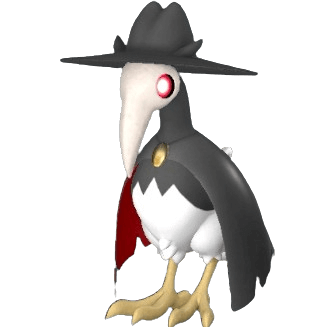
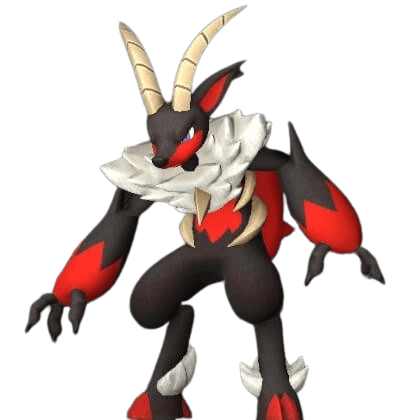
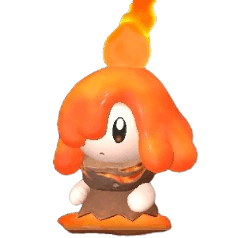
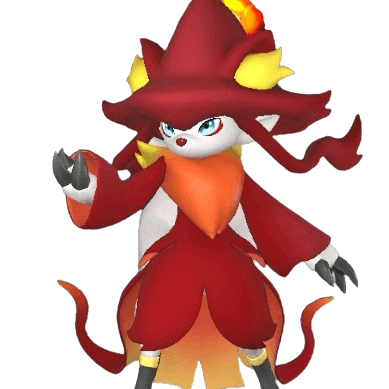
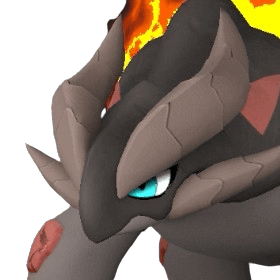
Boss Pals and Rare Drops

No Pal Drop
1 Lamball
Lamball
Ring of Resistance Ring of Resistance
2 Cattiva
Cattiva
Ring of Resistance Ring of Resistance
3 Chikipi
Chikipi
Ring of Resistance Ring of Resistance
4 Lifmunk
Lifmunk
Ring of Grass Resistance Ring of Grass Resistance
5 Foxparks
Foxparks
Ring of Flame Resistance Ring of Flame Resistance
6 Fuack
Fuack
Ring of Water Resistance Ring of Water Resistance
8 Tanzee
Tanzee
Ring of Grass Resistance Ring of Grass Resistance
9 Rooby
Rooby
Ring of Earth Resistance Ring of Earth Resistance
10 Pengullet
Pengullet
Ring of Water Resistance Ring of Water Resistance
12 Jolthog
Jolthog
Ring of Lightning Resistance Ring of Lightning Resistance
13 Gumoss
Gumoss
Ring of Earth Resistance Ring of Earth Resistance
14 Vixy
Vixy
Ring of Resistance Ring of Resistance
15 Hoocrates
Hoocrates
Ring of Dark Resistance Ring of Dark Resistance
16 Teafant
Teafant
Ring of Water Resistance Ring of Water Resistance
17 Depresso
Depresso
Ring of Dark Resistance Ring of Dark Resistance
18 Cremis
Cremis
Ring of Resistance Ring of Resistance
19 Daedream
Daedream
Ring of Dark Resistance Ring of Dark Resistance
20 Rushoar
Rushoar
Ring of Earth Resistance Ring of Earth Resistance
22 Fuddler
Fuddler
Ring of Earth Resistance Ring of Earth Resistance
23 Killamari
Killamari
Ring of Dark Resistance Ring of Dark Resistance
24 Mau
Mau
Ring of Dark Resistance Ring of Dark Resistance
25 Celaray
Celaray
Ring of Water Resistance +1 Ring of Water Resistance +1
26 Direhowl
Direhowl
Ring of Resistance Ring of Resistance
35 Caprity
Caprity
Ring of Grass Resistance +1 Ring of Grass Resistance +1
36 Melpaca
Melpaca
Ring of Resistance +1 Ring of Resistance +1
37 Eikthyrdeer
Eikthyrdeer
Ring of Resistance +1 Ring of Resistance +1
64 Dinossom
Dinossom
Ring of Grass Resistance Ring of Grass Resistance
68 Tombat
Tombat
Ring of Dark Resistance +1 Ring of Dark Resistance +1
No Pal Drop
21 Nox
Nox
Ring of Resistance Ring of Resistance
27 Tocotoco
Tocotoco
Ring of Resistance Ring of Resistance
29 Mozzarina
Mozzarina
Ring of Resistance +1 Ring of Resistance +1
32 Hangyu
Hangyu
Ring of Earth Resistance Ring of Earth Resistance
34 Woolipop
Woolipop
Ring of Resistance Ring of Resistance
39 Ribunny
Ribunny
Ring of Resistance Ring of Resistance
42 Arsox
Arsox
Ring of Flame Resistance +1 Ring of Flame Resistance +1
43 Dumud
Dumud
Ring of Earth Resistance +1 Ring of Earth Resistance +1
44 Cawgnito
Cawgnito
Ring of Dark Resistance Ring of Dark Resistance
47 Galeclaw
Galeclaw
Ring of Resistance Ring of Resistance
54 Sweepa
Sweepa
Ring of Ice Resistance +1 Ring of Ice Resistance +1
56 Univolt
Univolt
Ring of Lightning Resistance +1 Ring of Lightning Resistance +1
65 Surfent
Surfent
Ring of Water Resistance +1 Ring of Water Resistance +1
81 Kelpsea
Kelpsea
Ring of Water Resistance Ring of Water Resistance
No Pal Drop
28 Flopie
Flopie
Ring of Grass Resistance Ring of Grass Resistance
30 Bristla
Bristla
Ring of Grass Resistance Ring of Grass Resistance
31 Gobfin
Gobfin
Ring of Water Resistance Ring of Water Resistance
33 Mossanda
Mossanda
Ring of Grass Resistance +1 Ring of Grass Resistance +1
41 Cinnamoth
Cinnamoth
Ring of Grass Resistance +1 Ring of Grass Resistance +1
46 Loupmoon
Loupmoon
Ring of Dark Resistance Ring of Dark Resistance
47 Galeclaw
Galeclaw
Ring of Resistance Ring of Resistance
48 Robinquill
Robinquill
Ring of Grass Resistance Ring of Grass Resistance
49 Gorirat
Gorirat
Ring of Resistance Ring of Resistance
52 Grintale
Grintale
Ring of Resistance Ring of Resistance
75 Katress
Katress
Ring of Dark Resistance +1 Ring of Dark Resistance +1
94 Felbat
Felbat
Ring of Dark Resistance Ring of Dark Resistance
No Pal Drop
40 Incineram
Incineram
Ring of Flame Resistance +1 Ring of Flame Resistance +1
43 Dumud
Dumud
Ring of Earth Resistance +1 Ring of Earth Resistance +1
45 Leezpunk
Leezpunk
Ring of Dark Resistance Ring of Dark Resistance
58 Pyrin
Pyrin
Ring of Flame Resistance +1 Ring of Flame Resistance +1
70 Flambelle
Flambelle
Ring of Earth Resistance Ring of Earth Resistance
71 Vanwyrm
Vanwyrm
Ring of Flame Resistance +1 Ring of Flame Resistance +1
72 Bushi
Bushi
Crossbow Schematic 4 Crossbow Schematic 4
74 Ragnahawk
Ragnahawk
Ring of Flame Resistance +1 Ring of Flame Resistance +1
76 Wixen
Wixen
Ring of Flame Resistance Ring of Flame Resistance
84 Blazehowl
Blazehowl
Ring of Flame Resistance +1 Ring of Flame Resistance +1
88 Reptyro
Reptyro
Ring of Flame Resistance +1 Ring of Flame Resistance +1
93 Fenglope
Fenglope
Ring of Resistance +1 Ring of Resistance +1
31B Gobfin-Ignis
Gobfin-Ignis
Ring of Flame Resistance Ring of Flame Resistance
45B Leezpunk-Ignis
Leezpunk-Ignis
Ring of Flame Resistance Ring of Flame Resistance
58B Pyrin-Noct
Pyrin-Noct
Ring of Dark Resistance +1 Ring of Dark Resistance +1
81B Kelpsea-Ignis
Kelpsea-Ignis
Ring of Flame Resistance Ring of Flame Resistance
84B Blazehowl-Noct
Blazehowl-Noct
Ring of Dark Resistance +1 Ring of Dark Resistance +1
No Pal Drop
22 Fuddler
Fuddler
Ring of Earth Resistance Ring of Earth Resistance
27 Tocotoco
Tocotoco
Ring of Resistance Ring of Resistance
32 Hangyu
Hangyu
Ring of Earth Resistance Ring of Earth Resistance
38 Nitewing
Nitewing
Ring of Resistance Ring of Resistance
44 Cawgnito
Cawgnito
Ring of Dark Resistance Ring of Dark Resistance
45 Leezpunk
Leezpunk
Ring of Dark Resistance Ring of Dark Resistance
60 Rayhound
Rayhound
Ring of Lightning Resistance +1 Ring of Lightning Resistance +1
62 Dazzi
Dazzi
Ring of Lightning Resistance +1 Ring of Lightning Resistance +1
67 Digtoise
Digtoise
Ring of Earth Resistance +1 Ring of Earth Resistance +1
69 Lovander
Lovander
Ring of Resistance +1 Ring of Resistance +1
73 Beakon
Beakon
Handgun Schematic 4 Handgun Schematic 4
48B Robinquill-Terra
Robinquill-Terra
Ring of Earth Resistance Ring of Earth Resistance
64B Dinossom-Lux
Dinossom-Lux
Ring of Lightning Resistance +2 Ring of Lightning Resistance +2
65B Surfent-Terra
Surfent-Terra
Ring of Earth Resistance +1 Ring of Earth Resistance +1
No Pal Drop
10 Pengullet
Pengullet
Ring of Water Resistance Ring of Water Resistance
55 Chillet
Chillet
Cloth Outfit Schematic 4 Cloth Outfit Schematic 4
59 Reindrix
Reindrix
Ring of Ice Resistance +1 Ring of Ice Resistance +1
63 Lunaris
Lunaris
Ring of Resistance Ring of Resistance
66 Maraith
Maraith
Ring of Dark Resistance +1 Ring of Dark Resistance +1
68 Tombat
Tombat
Ring of Dark Resistance +1 Ring of Dark Resistance +1
79 Sibelyx
Sibelyx
Ring of Ice Resistance +1 Ring of Ice Resistance +1
80 Elphidran
Elphidran
Cold Resistant Refined Metal Armor Schematic 4 Cold Resistant Refined Metal Armor Schematic 4
83 Cryolinx
Cryolinx
Ring of Ice Resistance +1 Ring of Ice Resistance +1
95 Quivern
Quivern
Ring of Dragon Resistance +1 Ring of Dragon Resistance +1
102B Suzaku-Aqua
Suzaku-Aqua
Ring of Water Resistance +2 Ring of Water Resistance +2
24B Mau-Cryst
Mau-Cryst
Ring of Ice Resistance Ring of Ice Resistance
71B Vanwyrm-Cryst
Vanwyrm-Cryst
Ring of Ice Resistance +1 Ring of Ice Resistance +1
88B Ice-Reptyro
Ice-Reptyro
Ring of Ice Resistance +1 Ring of Ice Resistance +1
90B Mammorest-Cryst
Mammorest-Cryst
Ring of Ice Resistance +2 Ring of Ice Resistance +2

Treasure Chest Loot

Schematic (Blueprint)

Schematics in Hillside Cavern
Old Bow Schematic 1
Old Bow Schematic 1
Old Bow Schematic 2
Old Bow Schematic 2
Old Bow Schematic 4
Old Bow Schematic 4
Crossbow Schematic 1
Crossbow Schematic 2
Crossbow Schematic 3
Feather Hairpin Schematic 1
Feathered Hair Band Schematic 2
Feathered Hair Band Schematic 4
Cloth Outfit Schematic 4
Pelt Armor Schematic 1
Pelt Armor Schematic 4
Heat Resistant Pelt Armor Schematic 1
Cold Resistant Pelt Armor Schematic 1

How to Get Schematics

Accessories

Accessories in Hillside Cavern
Attack Pendant +2 Attack Pendant +2 Defense Pendant +2 Defense Pendant +2
Life Pendant +2 Life Pendant +2 Pendant of Diligence +2 Pendant of Diligence +2
Heat Resistant Undershirt +2 Heat Resistant Undershirt +2 Thermal Undershirt +2 Thermal Undershirt +2

List of Accessories

Skill Fruits

Skill Fruits in Hillside Cavern
 Air Cannon Air Cannon  Seed Mine Seed Mine
 Grass Tornado Grass Tornado  Wind Cutter Wind Cutter
 Bubble Blast Bubble Blast  Acid Rain Acid Rain
 Flare Arrow Flare Arrow  Spirit Fire Spirit Fire
 Flare Storm Flare Storm  Shockwave Shockwave
 Electric Ball Electric Ball  Tri-Lightning Tri-Lightning
 Lightning Streak Lightning Streak  Sand Tornado Sand Tornado
 Stone Cannon Stone Cannon  Icicle Cutter Icicle Cutter
 Shadow Burst Shadow Burst  Dragon Cannon Dragon Cannon
 Dragon Burst Dragon Burst

All Skill Fruit Locations and Uses

Schematic (Blueprint)

Schematics in Isolated Island Cavern
 Crossbow Schematic 1
Crossbow Schematic 1
Feathered Hair Band Schematic 1
Feathered Hair Band Schematic 2
Feathered Hair Band Schematic 4

How to Get Schematics

Accessories

Accessories in Isolated Island Cavern
Attack Pendant +2 Attack Pendant +2 Defense Pendant +2 Defense Pendant +2
Life Pendant +2 Life Pendant +2 Pendant of Diligence +2 Pendant of Diligence +2
Heat Resistant Undershirt +2 Heat Resistant Undershirt +2 Thermal Undershirt +2 Thermal Undershirt +2

List of Accessories

Skill Fruits

Skill Fruits in Isolated Island Cavern
 Seed Mine Seed Mine Spirit Fire Spirit Fire
 Sand Tornado Sand Tornado  Iceberg Iceberg
 Dragon Cannon Dragon Cannon

All Skill Fruit Locations and Uses

Schematic (Blueprint)

Schematics in Ravine Grotto
 Crossbow Schematic 1
Crossbow Schematic 1
Feathered Hair Band Schematic 1
 Pelt Armor Schematic 1
Pelt Armor Schematic 1
 Pelt Armor Schematic 2
Pelt Armor Schematic 2
 Tropical Outfit Schematic 1
Tropical Outfit Schematic 1

How to Get Schematics

Accessories

Accessories in Ravine Grotto
Attack Pendant +2 Attack Pendant +2 Defense Pendant +2 Defense Pendant +2
Life Pendant +2 Life Pendant +2 Pendant of Diligence +2 Pendant of Diligence +2
Heat Resistant Undershirt +2 Heat Resistant Undershirt +2 Thermal Undershirt +2 Thermal Undershirt +2

List of Accessories

Skill Fruits

Skill Fruits in Ravine Grotto
 Power Bomb Power Bomb  Bubble Blast Bubble Blast
 Hydro Jet Hydro Jet  Flare Arrow Flare Arrow
 Ignis Breath Ignis Breath  Ignis Blast Ignis Blast
 Sand Blast Sand Blast  Poison Blast Poison Blast
 Dragon Cannon Dragon Cannon

All Skill Fruit Locations and Uses

Schematic (Blueprint)

Schematics in Mountain Stream Grotto
 Handgun Schematic 1
Handgun Schematic 1
 Handgun Schematic 2
Handgun Schematic 2
 Handgun Schematic 3
Handgun Schematic 3
 Metal Helm Schematic 1
Metal Helm Schematic 1
 Metal Helm Schematic 2
Metal Helm Schematic 2
 Metal Armor Schematic 1
Metal Armor Schematic 1
 Heat Resistant Metal Armor Schematic 1
Heat Resistant Metal Armor Schematic 1
 Cold Resistant Metal Armor Schematic 1
Cold Resistant Metal Armor Schematic 1
 Cold Resistant Metal Armor Schematic 3
Cold Resistant Metal Armor Schematic 3

How to Get Schematics

Accessories

Accessories in Mountain Stream Grotto
Attack Pendant +2 Attack Pendant +2 Defense Pendant +2 Defense Pendant +2
Life Pendant +2 Life Pendant +2 Pendant of Diligence +2 Pendant of Diligence +2
Heat Resistant Undershirt +2 Heat Resistant Undershirt +2 Thermal Undershirt +2 Thermal Undershirt +2

List of Accessories

Skill Fruits

Skill Fruits in Mountain Stream Grotto
 Bubble Blast Bubble Blast  Aqua Burst Aqua Burst
 Hydro Jet Hydro Jet  Spark Blast Spark Blast
 Lightning Streak Lightning Streak  Sand Blast Sand Blast
 Ice Missile Ice Missile  Spirit Flame Spirit Flame
 Draconic Breath Draconic Breath

All Skill Fruit Locations and Uses

Schematic (Blueprint)

Schematics in Cavern of the Dunes
Crossbow Schematic 4
Pump-action Shotgun Schematic 1
Pump-action Shotgun Schematic 2
Pump-action Shotgun Schematic 4
Metal Armor Schematic 1
Metal Armor Schematic 2
Metal Armor Schematic 3
Refined Metal Armor Schematic 1
Refined Metal Armor Schematic 2
Refined Metal Armor Schematic 3
Heat Resistant Metal Armor Schematic 4
Cold Resistant Metal Armor Schematic 4
Heat Resistant Refined Metal Armor Schematic 2
Cold Resistant Refined Metal Armor Schematic 1

How to Get Schematics

Accessories

Accessories in Cavern of the Dunes
Attack Pendant +2 Attack Pendant +2 Defense Pendant +2 Defense Pendant +2
Life Pendant +2 Life Pendant +2 Pendant of Diligence +2 Pendant of Diligence +2
Heat Resistant Undershirt +2 Heat Resistant Undershirt +2 Thermal Undershirt +2 Thermal Undershirt +2

List of Accessories

Skill Fruits

Skill fruits in Cavern of the Dunes
Implode Implode Pal Blast Pal Blast
Spine Vine Spine Vine Acid Rain Acid Rain
Ignis Blast Ignis Blast Flare Storm Flare Storm
Ignis Rage Ignis Rage Tri-Lightning Tri-Lightning
Lightning Bolt Lightning Bolt Lightning Strike Lightning Strike
Rock Lance Rock Lance Iceberg Iceberg
Cryst Breath Cryst Breath Poison Blast Poison Blast
Nightmare Ball Nightmare Ball Dark Laser Dark Laser
Dragon Burst Dragon Burst

All Skill Fruit Locations and Uses

Schematic (Blueprint)

Schematics in Volcanic Cavern
Handgun Schematic 4
Handgun Schematic 4
Assault Rifle Schematic 1
Assault Rifle Schematic 4
Rocket Launcher Schematic 4
Metal Armor Schematic 1
Metal Armor Schematic 2
Refined Metal Helm Schematic 4
Refined Metal Armor Schematic 1
Refined Metal Armor Schematic 2
Heat Resistant Refined Metal Armor Schematic 1
Heat Resistant Refined Metal Armor Schematic 2
Heat Resistant Refined Metal Armor Schematic 4
Cold Resistant Refined Metal Armor Schematic 1

How to Get Schematics

Accessories

Accessories in Volcanic Cavern
Attack Pendant +2 Attack Pendant +2 Defense Pendant +2 Defense Pendant +2
Life Pendant +2 Life Pendant +2 Pendant of Diligence +2 Pendant of Diligence +2
Heat Resistant Undershirt +2 Heat Resistant Undershirt +2 Thermal Undershirt +2 Thermal Undershirt +2

List of Accessories

Skill Fruits

Skill Fruits in Volcanic Cavern
 Aqua Burst Aqua Burst  Acid Rain Acid Rain
 Ignis Breath Ignis Breath  Flare Storm Flare Storm
 Rock Lance Rock Lance  Iceberg Iceberg
 Dark Laser Dark Laser

All Skill Fruit Locations and Uses

Schematic (Blueprint)

Schematics in Sacred Mountain Cavern
Rocket Launcher Schematic 1
Rocket Launcher Schematic 2
Cloth Outfit Schematic 4
Pal Metal Helm Schematic 1
Pal Metal Armor Schematic 1
Pal Metal Armor Schematic 2
Cold Resistant Refined Metal Armor Schematic1
Cold Resistant Refined Metal Armor Schematic 1
Cold Resistant Refined Metal Armor Schematic 4
Heat Resistant Pal Metal Armor Schematic 1
Heat Resistant Pal Metal Armor Schematic 2
Cold Resistant Pal Metal Armor Schematic 1

How to Get Schematics

Accessories

Accessories in Sacred Mountain Cavern
Attack Pendant +2 Attack Pendant +2 Defense Pendant +2 Defense Pendant +2
Life Pendant +2 Life Pendant +2 Pendant of Diligence +2 Pendant of Diligence +2
Heat Resistant Undershirt +2 Heat Resistant Undershirt +2 Thermal Undershirt +2 Thermal Undershirt +2

List of Accessories

Skill Fruits

Skill Fruits in Sacred Mountain Cavern
Implode Implode Pal Blast Pal Blast
Seed Mine Seed Mine Spine Vine Spine Vine
Grass Tornado Grass Tornado Bubble Blast Bubble Blast
Hydro Laser Hydro Laser Fire Ball Fire Ball
Ignis Rage Ignis Rage Lock-on Laser Lock-on Laser
Tri-Lightning Tri-Lightning Lightning Strike Lightning Strike
 Sand Tornado Sand Tornado  Rock Lance Rock Lance
 Iceberg Iceberg  Poison Blast Poison Blast
 Nightmare Ball Nightmare Ball  Dark Laser Dark Laser
 Draconic Breath Draconic Breath

All Skill Fruit Locations and Uses

Dungeon Specifications

Availability of the Dungeon

Can Challenge Cannot Challenge

If the entrance to the Dungeon is darkened and a UI appears when approached, it means you can challenge it. If the entrance is not darkened and you can see inside, it means you cannot challenge it.

Disappears After Some Time

Disappears after a certain time

Dungeons disappear after a certain time. While their locations remain constant, they only have specific time windows for players to enter. You won’t be able to access them for a while after they disappear.

Dungeon Respawn Time

Respawn Time is Random

Respawn time is random

Dungeons respawn after another dungeon has been completed. If you want to re-explore a specific dungeon, finish other dungeons first until it respawns.

Respawn Time can be adjusted

Respawn Time can be adjusted

The time until the Dungeon disappears changes based on the Day Time and Night Time Speed. By extending the day and night time, the respawn time will be extended. If you want to have more time before the Dungeon disappears, it is advisable to extend the day and night progression.

Day Time and Night Time can be adjusted in the World Settings

The Day Time and Night Time can be changed by selecting World Settings from the title screen to the world selection screen. Extending the day and night time will make the days longer, so revert to the original setting once you have achieved your goal.

How to Escape Dungeons

Defeat Alpha Pal

Defeat the Boss

You can complete a dungeon by defeating its designated Alpha Pal. The Alpha Pal is a larger version of a regular Pal, similar to Field Bosses in the open world. Defeating or capturing the Alpha Pal unlocks a warp point you can use to escape.

Death

Death

If you die inside the dungeon, you can always respawn and try again. Based on your Death Penalty settings, you might also drop items upon death. If you didn’t set any of these penalties, it is recommended to die and respawn if you want to escape the dungeon without losing items.

Dropped items are found at the entrance

If you have set a Death Penalty, you don't have to worry. Dropped items will be found in front of the entrance.

Exit from the Entrance

Exit from the Entrance

You can also exit the dungeon by going back to the entrance. If you can't find the Alpha Pal or if you just came to gather resources, just trace back your steps and exit through the entrance.

Rewards for Exploring Dungeons

Capture Alpha Pals

Capture Bosses

There is always at least one Alpha Pal in each dungeon. The level of these Pals will scale with the player's level upon entering. So, make sure to check you and your friends’ levels, if you’re bringing some, before entering the dungeon.

Reroll Dungeon Bosses by Going Back Two Areas before the Boss Room

Before Change After Change

If the current Alpha Pal is not your desired Alpha Pal, you can despawn the boss by going back two areas before the boss room.

Abundant with Useful Resources

Abundant Resources such as Ores

Dungeons are rich in resources such as Ores and Sulfur. If there are dungeons near your base or unlocked fast travel points, it is best to keep farming them whenever they’re available.

Get Treasure Chests

Obtain Treasure Chests by Clearing Dungeons

By clearing dungeons, you can also get treasure chests. These chests contain valuable items such as gems and accessories. Gems can be sold to merchants for a high price and some gear you’ll find cannot be obtained through crafting. Actively farm dungeons when you can.

Palworld Walkthrough Wiki
Beginner Tips and Tricks
Recommended Beginner Pals
Strongest Pals
Strongest Pals
Recommended Difficulty Level
How to Set Up and Move Multiple Bases
Complete Pal List - Paldeck
How to Level Up
How to Level Up
How to Earn Money
How to Earn Money
How to Build a Ranch and Assign Pals
World Map
World Map
Adventure and Exploration Guide
How to Create a Character Recommended Difficulty Level
Multiplayer Is PvP Available?
Fast Travel Locations Building Guide
Beginner Tips and Tricks Death Penalty Setting
Technology Rewards Controller Settings
How to Earn Money Ancient Technology Points
How to Change Name Pal Elements Guide
Is There a Story? Moving and Placing Bases
Black Marketeer Locations How to Build a Ranch and Assign Pals
How to Level Up How to Cure Pal Injuries and Sickness
How to Craft and Equip Saddles How to Restore Sanity
Merchant Locations How to Restore HP
Boss Respawn Timers How to Catch Humans
How to Save Your Game How to Craft and Use Grappling Guns
Dungeon Locations Recommended Settings
How to Move Bases Base Level Missions
General Tips and Tricks Permanent Game Mechanics
Basebuilding Tips How to Deal with the Overweight Status
How to Change Time Difference between Solo and Multiplayer
How to Assign Pals Benefits of Joining a Guild
How to Recover Stamina Advantages at Night
How to Slide Base Size and Recommendations
Combat Mechanics
Pal Related Guide
How to Catch Pals How to Use Pals
How to Raise Pals Breeding Calculator
How to Rank Up Pals How to Get Lucky Pals
How to Use Pal Souls Best Starter Pals
How to Restore Hunger How to Get Fusion Pals
Strongest Pals Recommended Stat Allocation
Skill List Partner Skills
Active Skills Passive Skills
Wildlife Sanctuary Pals How to Butcher Pals
All Legendary Pals Pals that Increase Weight Limit
How to Hatch Eggs Inheriting Legendary Skills
How to Trade Pals How to Revive a Dead Pal
How to Check Passive Skills How to Cure Cold
How to Cure Sprain How to Cure Overfull Pals
How to Cure Ulcer How to Cure Fracture
How to Cure Weakness How to Cure Depression
How to Increase Movement Speed How to Breed Unique Pals
How to Increase Work Speed How to Speed Up Breeding
Pal Sphere Types
Item and Material Related Guide
How to Get Skill Fruits Item List
Equipment List Building List
Weapon List Material List
Accessory List Chest Types and Crafting Benefits
How to Get Schematics How to Get Food
Legendary Schematics How to Repair Items
How to Get the Best Equipment How to Get and Hatch Eggs
Product Information
Game Information Game Release Date
Compatible Platforms PC System Requirements
Achievements How to Set Up a Dedicated Server
Is Cross-Play Possible? Is VRM Supported?
Will There Be a Mobile App Version? Troubleshooting for Hosting Failures
Ratings and Reviews How to Install Mods
How to Rent a Server How to Set Up A Server
Latest Patch and Updates Bugs and Solution